|
|
|
|
|
|
Tunnel Portals
|
|
|
|
|
|
|
|
|
Anyone who has traveled on the RhB, or hiked along it, will most likely have noticed the many tunnels. Some may say a tunnel is a tunnel is a tunnel. As far as function is concerned, true, but there are noticeable differences when it comes to the portals at either end.
|
|
|
One of the books in my collection shows the different cross section of the tunnels. Yes, they vary according to lines and to some extent according to when they were built. the following samples have been scaled down to 1:22.5 (IIm)
|
|
|
|
|
|
|
|
© drawings removed to prevent unauthorized use, any question contact webmaster
|
|
|
|
|
|
|
|
Tunnel Portal Construction
|
|
|
|
|
|
|
|
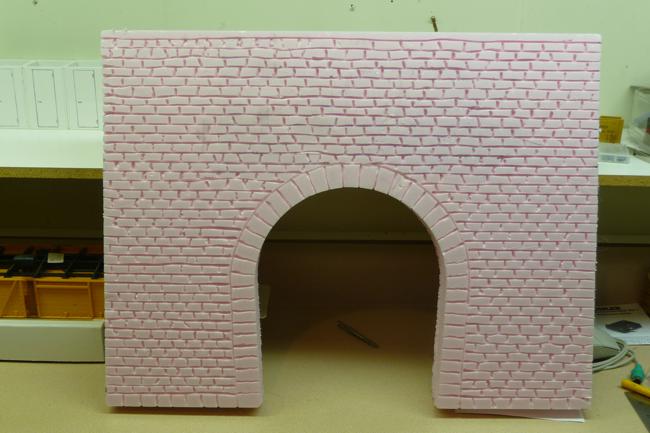
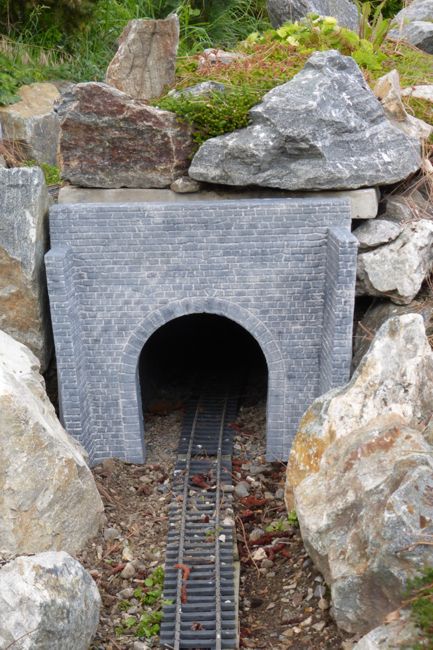
There are several methods to construct tunnel portals. Our favourite material for portals as well as retaining walls and stone bridges is Styrofoam. The really solid, dense kind for the garden and the more open, crumbly kind for indoor layouts.
|
|
|
To get uniform openings, corresponding stone borders and the proper row spacing we use our laser cutter - use it or lose it.
|
|
|
|
|
|
|
|
|
|
|
|
|
|
|
|
The stone pattern is engraved with an electronically regulated soldering iron which allows precise adjustment to get the desired width and depth of the mortar grooves.
|
|
|
|
|
|
|
|

|
|
|
|
|
|
|
|
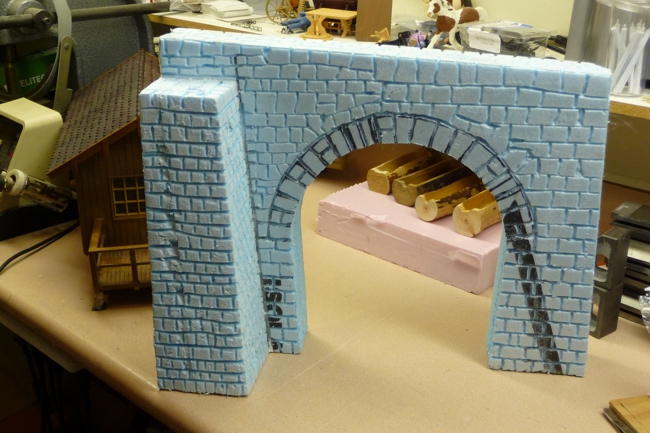
We decided on a common tunnel opening geometry, but each portal is “unique” to fit a specific location. In some instances existing portals along the Albula line were used for inspiration.
|
|
|
|
|
|
|
|
|
|
|
|
|
|
|
|
Depending on the location one can also create a mirror image version of the prototype structure like the South portal of the Zaleint Tunnel.
|
|
|
|
|
|
|
|
After engraving the stone work the Styrofoam get’s coated with “ProLite Tile and Stone Mortar. In addition to sealing the Styrofoam this product has enough “grit” to simulate hewn stone and is a good base for either acrylic or latex paint.
|
|
|
|
|
|
|
|
|
|
|
|
|
|
|
|
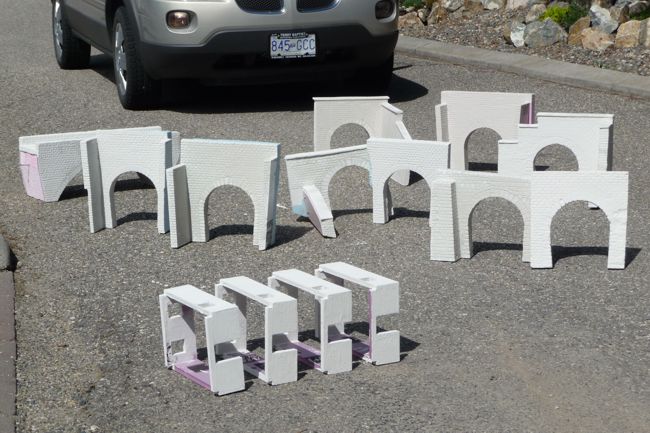
While it takes extra space in the work shop, doing these projects in batches saves considerably on prep and clean-up time. To speed the process even more, it is recommended to do the mortar coating during the summer month when drying time is greatly reduced.
|
|
|
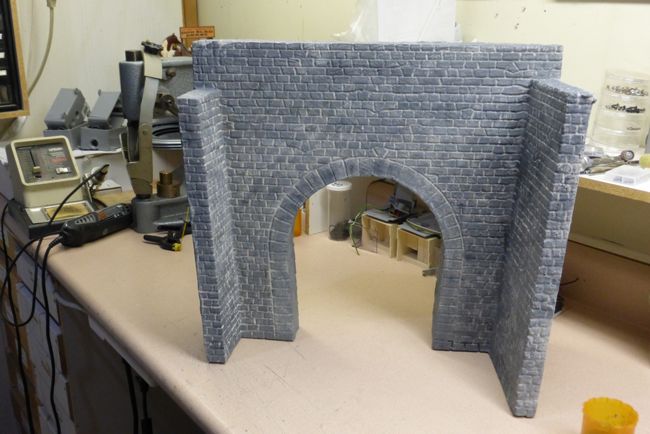
The same can be said for painting, warm dry weather is a great helper. The base coat of a very light gray tone is a flat outdoor latex paint. Applied with an industrial spray gun or with a brush; obviously the spray gun will result in a more even application.
|
|
|
After the base has dried, one can start painting the stones with acrylics. If it’s “a first attempt” we recommend using a test piece to not only get a feel for the process, but also to have a piece to set out in natural sunlight. You will be amazed at the difference between the appearance under artificial light and sunlight. If it goes out in the garden test the colours in the garden.
|
|
|
|
|
|
|
|
|
|
|
|
|
|
|
|
Muot North on the work bench and .....
|
|
|
|
|
|
|
|
|
|
|
|
|
|
|
|
.... out on the garden layout.
|
|
|
On the following page you’ll find the various portals, starting with the mirrored Zaleint portal, both in the raw and in test positioning on the layout.
|
|
|
|
|
|
|
|
|
|
|
Next page
|
|
|
|
|
|